E-bike laws are being written that make no sense at all.
But let’s start with Federal Law:
At the federal level, a 2002 law enacted by Congress, HB 727,
amended the Consumer Product Safety Commission definition
of e-bikes. The law defined a low-speed electric bicycle as “A
two- or three-wheeled vehicle with fully operable pedals and an
electric motor of less than 750 watts (1 hp), whose maximum
speed on a paved level surface, when powered solely by such a
motor while ridden by an operator who weighs 170 pounds,
is less than 20 mph.” The federal law permits e-bikes to be
powered by the motor alone (a “throttle-assist” e-bike), or by a
combination of motor and human power (a “pedal-assist” e-bike).
Editorial Comment: Makes sense. No issue here.
And Pennsylvania State Law:
At the Pennsylvania state level (2014 Act 154), “Pedalcycle with
electric assist.” A vehicle weighing not more than 100 pounds with
two or three wheels more than 11 inches in diameter, manufactured
or assembled with an electric motor system rated at not more than
750 watts and equipped with operable pedals and capable of a
speed not more than 20 miles per hour on a level surface when
powered by the motor source only.
In addition, e-bikes “do not require a certificate of inspection or
insurance” and “are afforded ALL of the rights and responsibilities of
other bicycles under PA law”. PENNSYLVANIA E-BIKE LAW handout.
Editorial Comment: Makes sense. No issue here. Sounds a lot like the Federal Law.
But what just happened in New Jersey?
As of January 19, 2026, New Jersey has enacted the nation’s most restrictive e-bike laws, requiring registration, insurance, and a driver’s (or specialized) license for most e-bikes. Signed by Governor Phil Murphy, the law reclassifies Class 2 and 3 e-bikes as “motorized bicycles”.
Key Aspects of the New Jersey E-Bike Law (2026):
- Licensing & Age: Riders must be at least 15 years old and possess a valid driver’s license or a
specialized “motorized bicycle” license (requires a written/vision/road test). Riders under 15 are prohibited from riding on public property. - Registration & Insurance: All e-bikes must be registered with the Motor Vehicle Commission.
Class 2 and 3 e-bikes require liability insurance. - Helmets: DOT-approved helmets are mandatory for Class 3 riders and anyone under 17.
- Restrictions: The law prohibits riding on sidewalks and generally bans them on natural surface
trails. It also mandates safety equipment like lights and a horn.
Upcoming Deadlines:
July 20, 2026: Deadline to register your e-bike. The first year of registration is free.
New Jersey’s E-Bike Law: What Retailers and Riders Need to Know About S4834

Source: https://www.peopleforbikes.org/news/new-jersey-most-restrictive-ebike-law
Editorial Comment: These restrictions are ridiculous, uninformed, and incredibly destructive to e-bike businesses in NJ and to tourism. And they do little to actually fix known abuses among e-bike riders which create enforcement and safety issues.
And now California is joining the ranks of the crazy lawmakers.
As of May 2026, California is strictly regulating e-bikes by enacting mandatory rear lights/reflectors, and enforcing a 750W motor cap. Key changes include mandatory labeling, potential registration/license plates (under proposed AB 1942), and retailer accountability. Here’s a summary of AB 1942:
California Assembly Bill 1942 (AB 1942), introduced by Assembly member Rebecca Bauer-Kahan and referred to as the “E-Bike Accountability Act,” is a piece of proposed legislation in the 2025–2026 session aimed at increasing oversight of electric bicycles.
Core Provisions
If passed in its current form, AB 1942 would:
- Mandate Registration: Require owners of Class 2 and Class 3 electric bicycles to register their bikes with the California Department of Motor Vehicles (DMV).
- Require License Plates: Mandate the display of a special license plate issued by the DMV on these bicycles.
- Proof of Ownership: Require riders to carry documentation verifying ownership that matches the bike’s serial number.
- Enforcement: Establish an “Electric Bicycle Registration Fund” to manage the program and allow law enforcement to issue fines for non-compliance.
Stated Purpose
The bill’s proponents, including Assemblymember Bauer-Kahan, argue that the measure is a necessary public safety response to the significant rise in e-bike-related injuries and the challenges police face in holding reckless riders accountable. Supporters contend that visible plates and a registry would improve accountability and help law enforcement identify riders who violate traffic laws.
Key Criticisms and Opposition
The bill has faced significant opposition from cycling advocacy groups (such as CalBike and Bike East Bay) and community members. Opponents raise several primary concerns:
- Focus on the Wrong Target: Critics argue the bill punishes users of legal, standard e-bikes rather than addressing the real issue: high-powered, illegal “e-motos” (electric motorcycles or mopeds mislabeled and sold as e-bikes) that often lack necessary safety equipment.
- Barrier to Sustainability: Opponents claim the additional costs and bureaucracy will discourage the use of e-bikes, which are seen as a vital, low-emission alternative to cars.
- Risk of Biased Policing: Critics warn that registration and license plate requirements could lead to an increase in pretextual, discriminatory police stops, noting that California previously moved to abolish local bike registration laws specifically to reduce such incidents.
- Impracticality: Opponents argue the requirements are logistically burdensome, as bicycles were not designed with mounts for license plates, and the administrative cost of the program may outweigh its benefits.
Current Status
As of late April 2026, the bill has passed through committee and was re-referred to the Committee on Appropriations.
And AB 1557
California Assembly Bill 1557 (AB 1557), introduced by Assembly member Diane Papan in the 2025–2026 session, proposes significant changes to how electric bicycles (e-bikes) are defined and regulated in California.
The bill is often discussed alongside AB 1942, but while AB 1942 focuses on registration and licensing, AB 1557 focuses on the technical specifications and speed limits of the bikes themselves.
Key Provisions
- Lower Speed Limits: The bill would reduce the maximum assisted speed for Class 1 and Class 2 e-bikes from 20 mph to 16 mph.
- Motor Power Caps: It prohibits manufacturers and retailers from selling Class 1 or Class 2 e-bikes with motors exceeding 250 watts of continuous power and 750 watts of peak power.
- New “Cargo E-Bike” Category: Recognizes “cargo electric bicycles” as a specific category, allowing them slightly more motor power (up to 750 watts continuous) to account for the heavier loads they carry.
- Age Restrictions: Prohibits anyone under the age of 16 from operating an e-bike with a motor exceeding 250 watts of continuous power.
- Enforcement & Penalties: Grants law enforcement the authority to impound non-compliant bicycles. Manufacturers or retailers in violation could face civil penalties ranging from $15,000 to $50,000.
Arguments for the Bill
Supporters, including some local government officials and safety advocates, argue that:
- Public Safety: Lowering speeds to 16 mph reduces the severity of accidents, particularly in high-traffic pedestrian areas and school zones.
- Clarity for Law Enforcement: By setting strict wattage and speed caps, it helps police distinguish between legal e-bikes and “e-motos” (high-powered electric motorcycles) that are currently being sold as e-bikes.
Arguments Against the Bill
The bill has met strong opposition from cycling advocacy groups (like CalBike) and major manufacturers (like Trek), who argue:
- Infrastructure Mismatch: Critics point out that California’s current “Three-Class” system is the national standard used in 45 states; breaking away from it would create a confusing “California-only” market.
- Safety Irony: Some argue that forcing e-bikes to go slower than 20 mph makes them less safe because it increases the speed differential between cyclists and cars in shared traffic.
- Economic Impact: The bill could effectively ban many popular e-bikes currently on the road, hurting both retailers and commuters who rely on them.
Current Status
As of May 2026, AB 1557 is currently moving through the legislative process. It was recently referred to the Assembly Appropriations Committee “suspense file,” a common step for bills with significant fiscal impacts where they are held for further review before a final vote.
California AB 1557 E-Bike Bill: Complete Public Testimony, For and Against
There’s an awful lot ink being spilled on the perceived issue of e-bike safety, and the craziness is not likely stop anytime soon. However, if you’re searching for some semblance of sanity with respect to this issue, one needs to look no further than my local community (Doylestown Township). Here’s what they have to say:
Ordinance NO. 432 (March 17, 2026), establishing Chapter 120, Bicycles, E-Bike and E-Scooters, to regulate the use of bicycles , E-Bikes and E-Scooters within Doylestown Township.
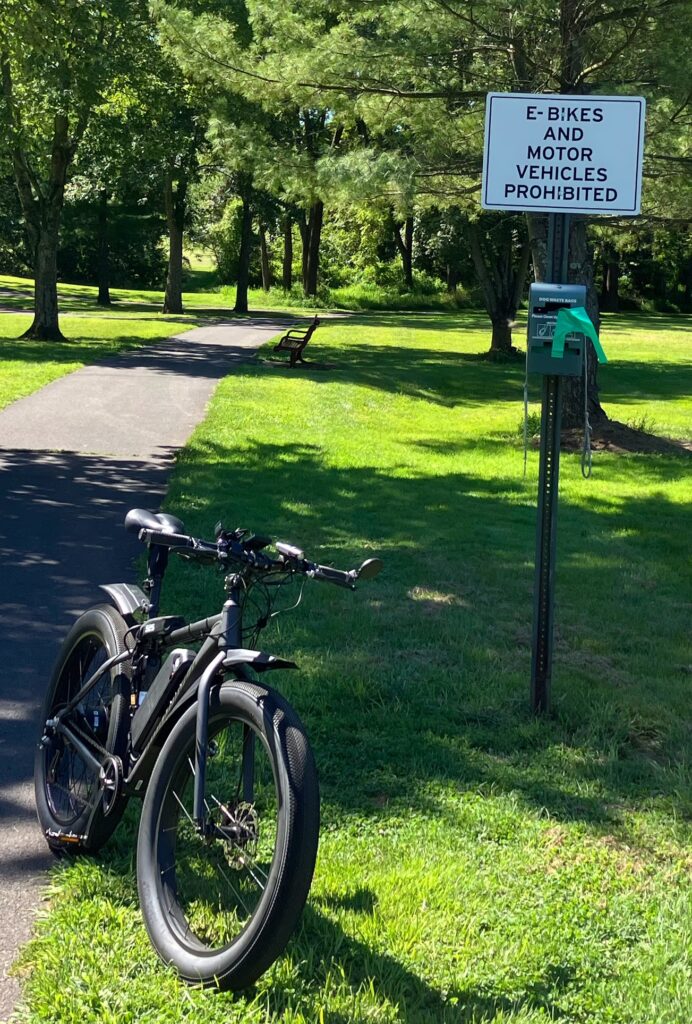
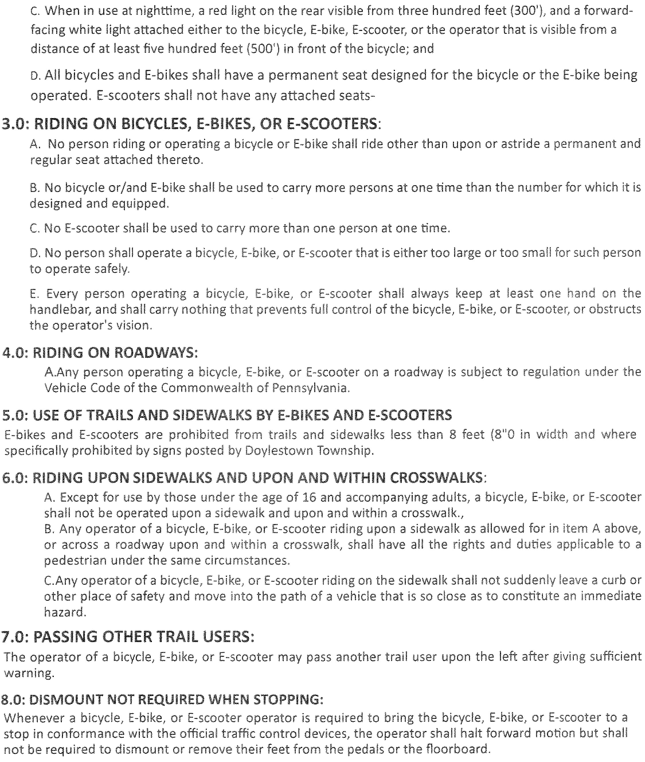
Where E-Bikes Are Permitted:
- Allowed on Township trails, parks, and roadways
- E-bikes and e-scooters are not permitted on trails less than 8 feet wide or where posted
- Sidewalk use is generally not permitted, except for riders under 16 accompanied by an adult
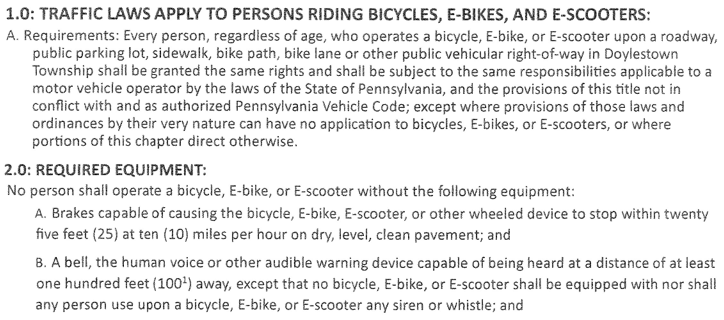
Must have:
- Working brakes
- A bell or audible warning device
- Lights/reflectors when used at night
Speed Limit:
- Maximum speed is 15 mph on Township property, or lower as conditions require
Enforcement:
- Enforced by Township Police
- Fines: $100 for first violation, $250 for second violation, Up to $500 for future violations
Editorial Comment: Brief, to the point, enforceable, and it leans on existing PA and Federal laws which are reasonable. How is this not enough to deal with the problem at hand?
And the Doylestown Township draft “Trail User Code”


Other useful information:
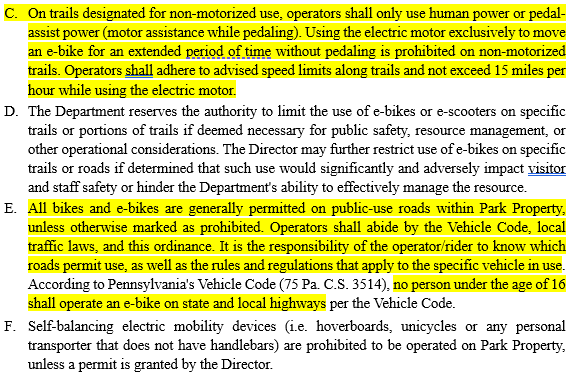
And Bucks County Park System Ordinance 170 from January 18, 2023 (Doylestown is aligned with this ordinance as they should be). From S7 Operation of Bicycles, E-bikes, and E-scooters:
“C. On trails designated for non-motorized use, operators shall only use human power or pedal-assist power (motor assistance while pedaling). Using the electric motor exclusively to move an e-bike for an extended period of time without pedaling is prohibited on non-motorized trails. Operators shall adhere to advised speed limits along trails and not exceed 15 miles per hour while using the electric motor.”
Federal, PA, Bucks County, Doylestown Township – they’re all aligned, reasonable, and enforceable. This is all that’s needed and the way it should be!
And https://thecyclistchoice.com/resources/pennsylvania-ebike-laws/

And now for a little entertainment:
Here’s what Kyle at Area 13 has to say about what’s going on in CA:
This California Law Could Kill E-Bikes on Monday