
You wouldn’t think of leaving home in your car without a spare tire, jack, lug wrench, roadside emergency kit with flashlight, blanket, screwdrivers, plyers, duct tape, air pump, jumper cables, etc. would you? Oh, you have AAA roadside service so you don’t need this stuff. Got it… Yet I do carry all this and more in my cars ‘just in case’, and in some cases I’m prepared to help someone else out who didn’t think all this was necessary. Besides, how often do our modern cars break down or blow a tire. Not often, but still.
Try getting roadside service for your e-bike. I don’t believe it exists (yet). So you’re on your own and you might just as well a) learn how to fix things that break, and b) carry the necessary tools and supplies when you ride. It doesn’t cost much, doesn’t weigh much, and is easy to carry. You just need to think through what you’re going to need and how to use it. Hopefully this post will help with that.
Let’s start with the basics. This image shows most* of the items I would plan to carry on a normal 10-20 mile bicycle ride:
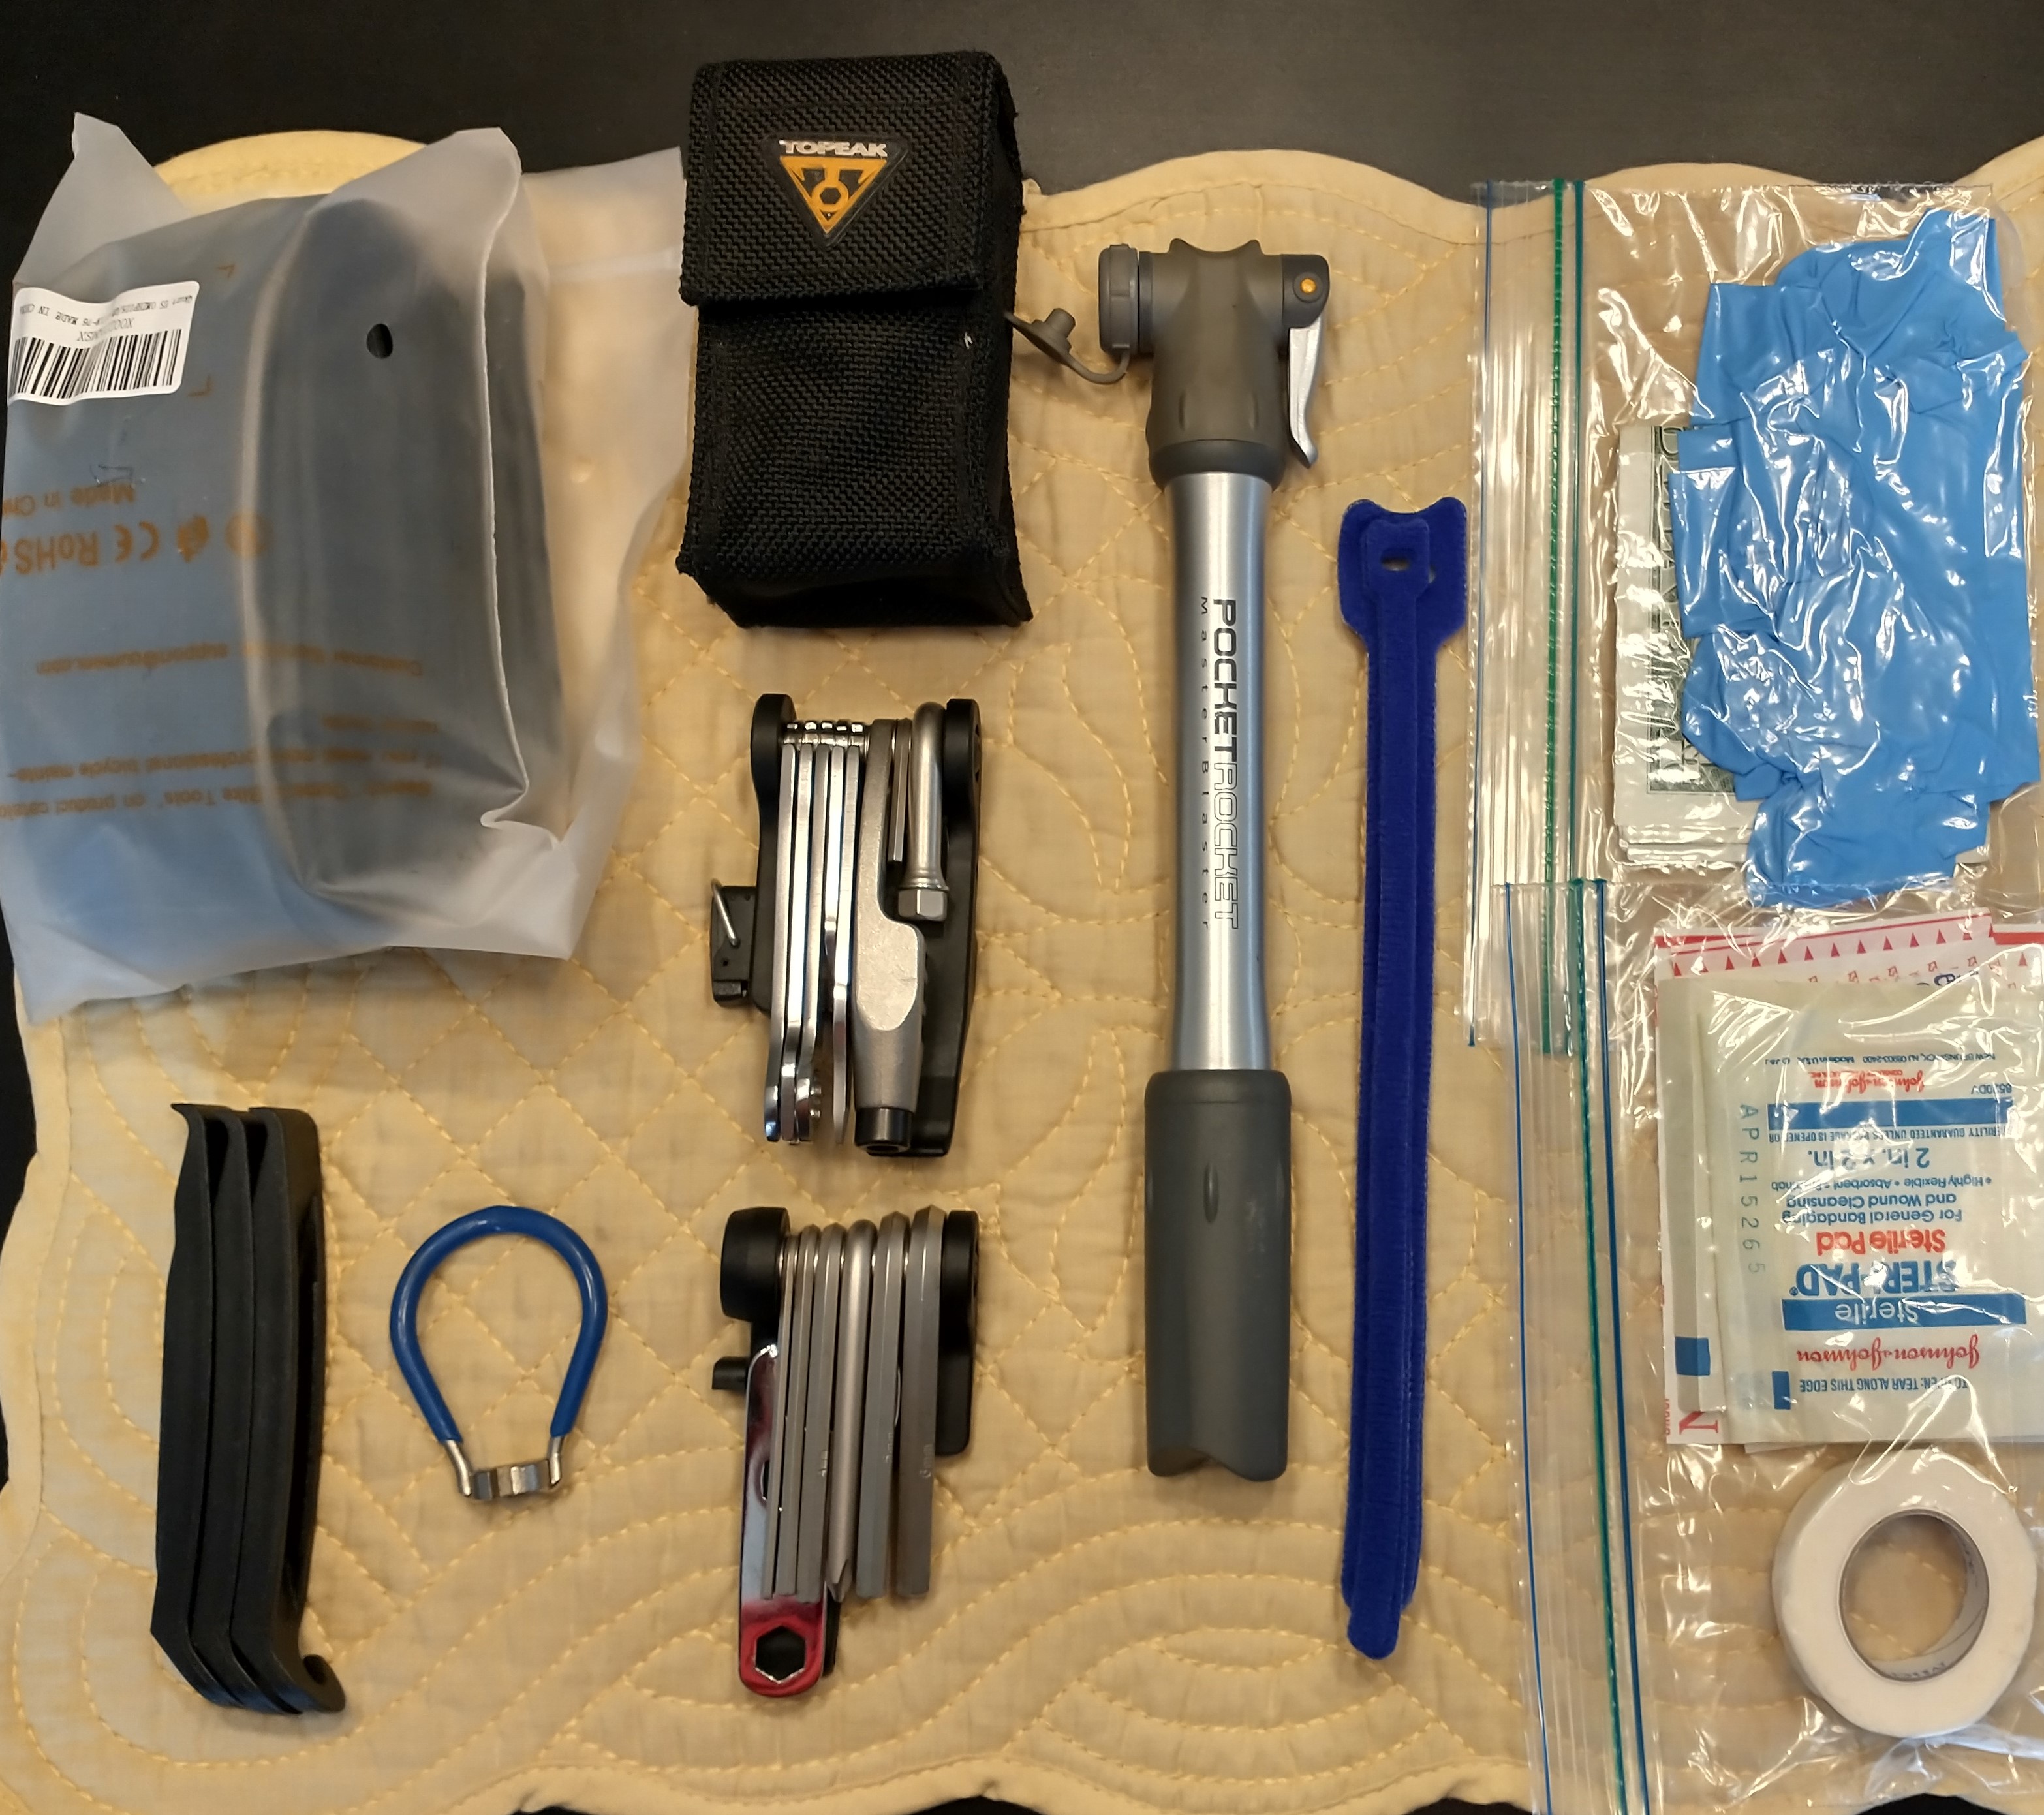
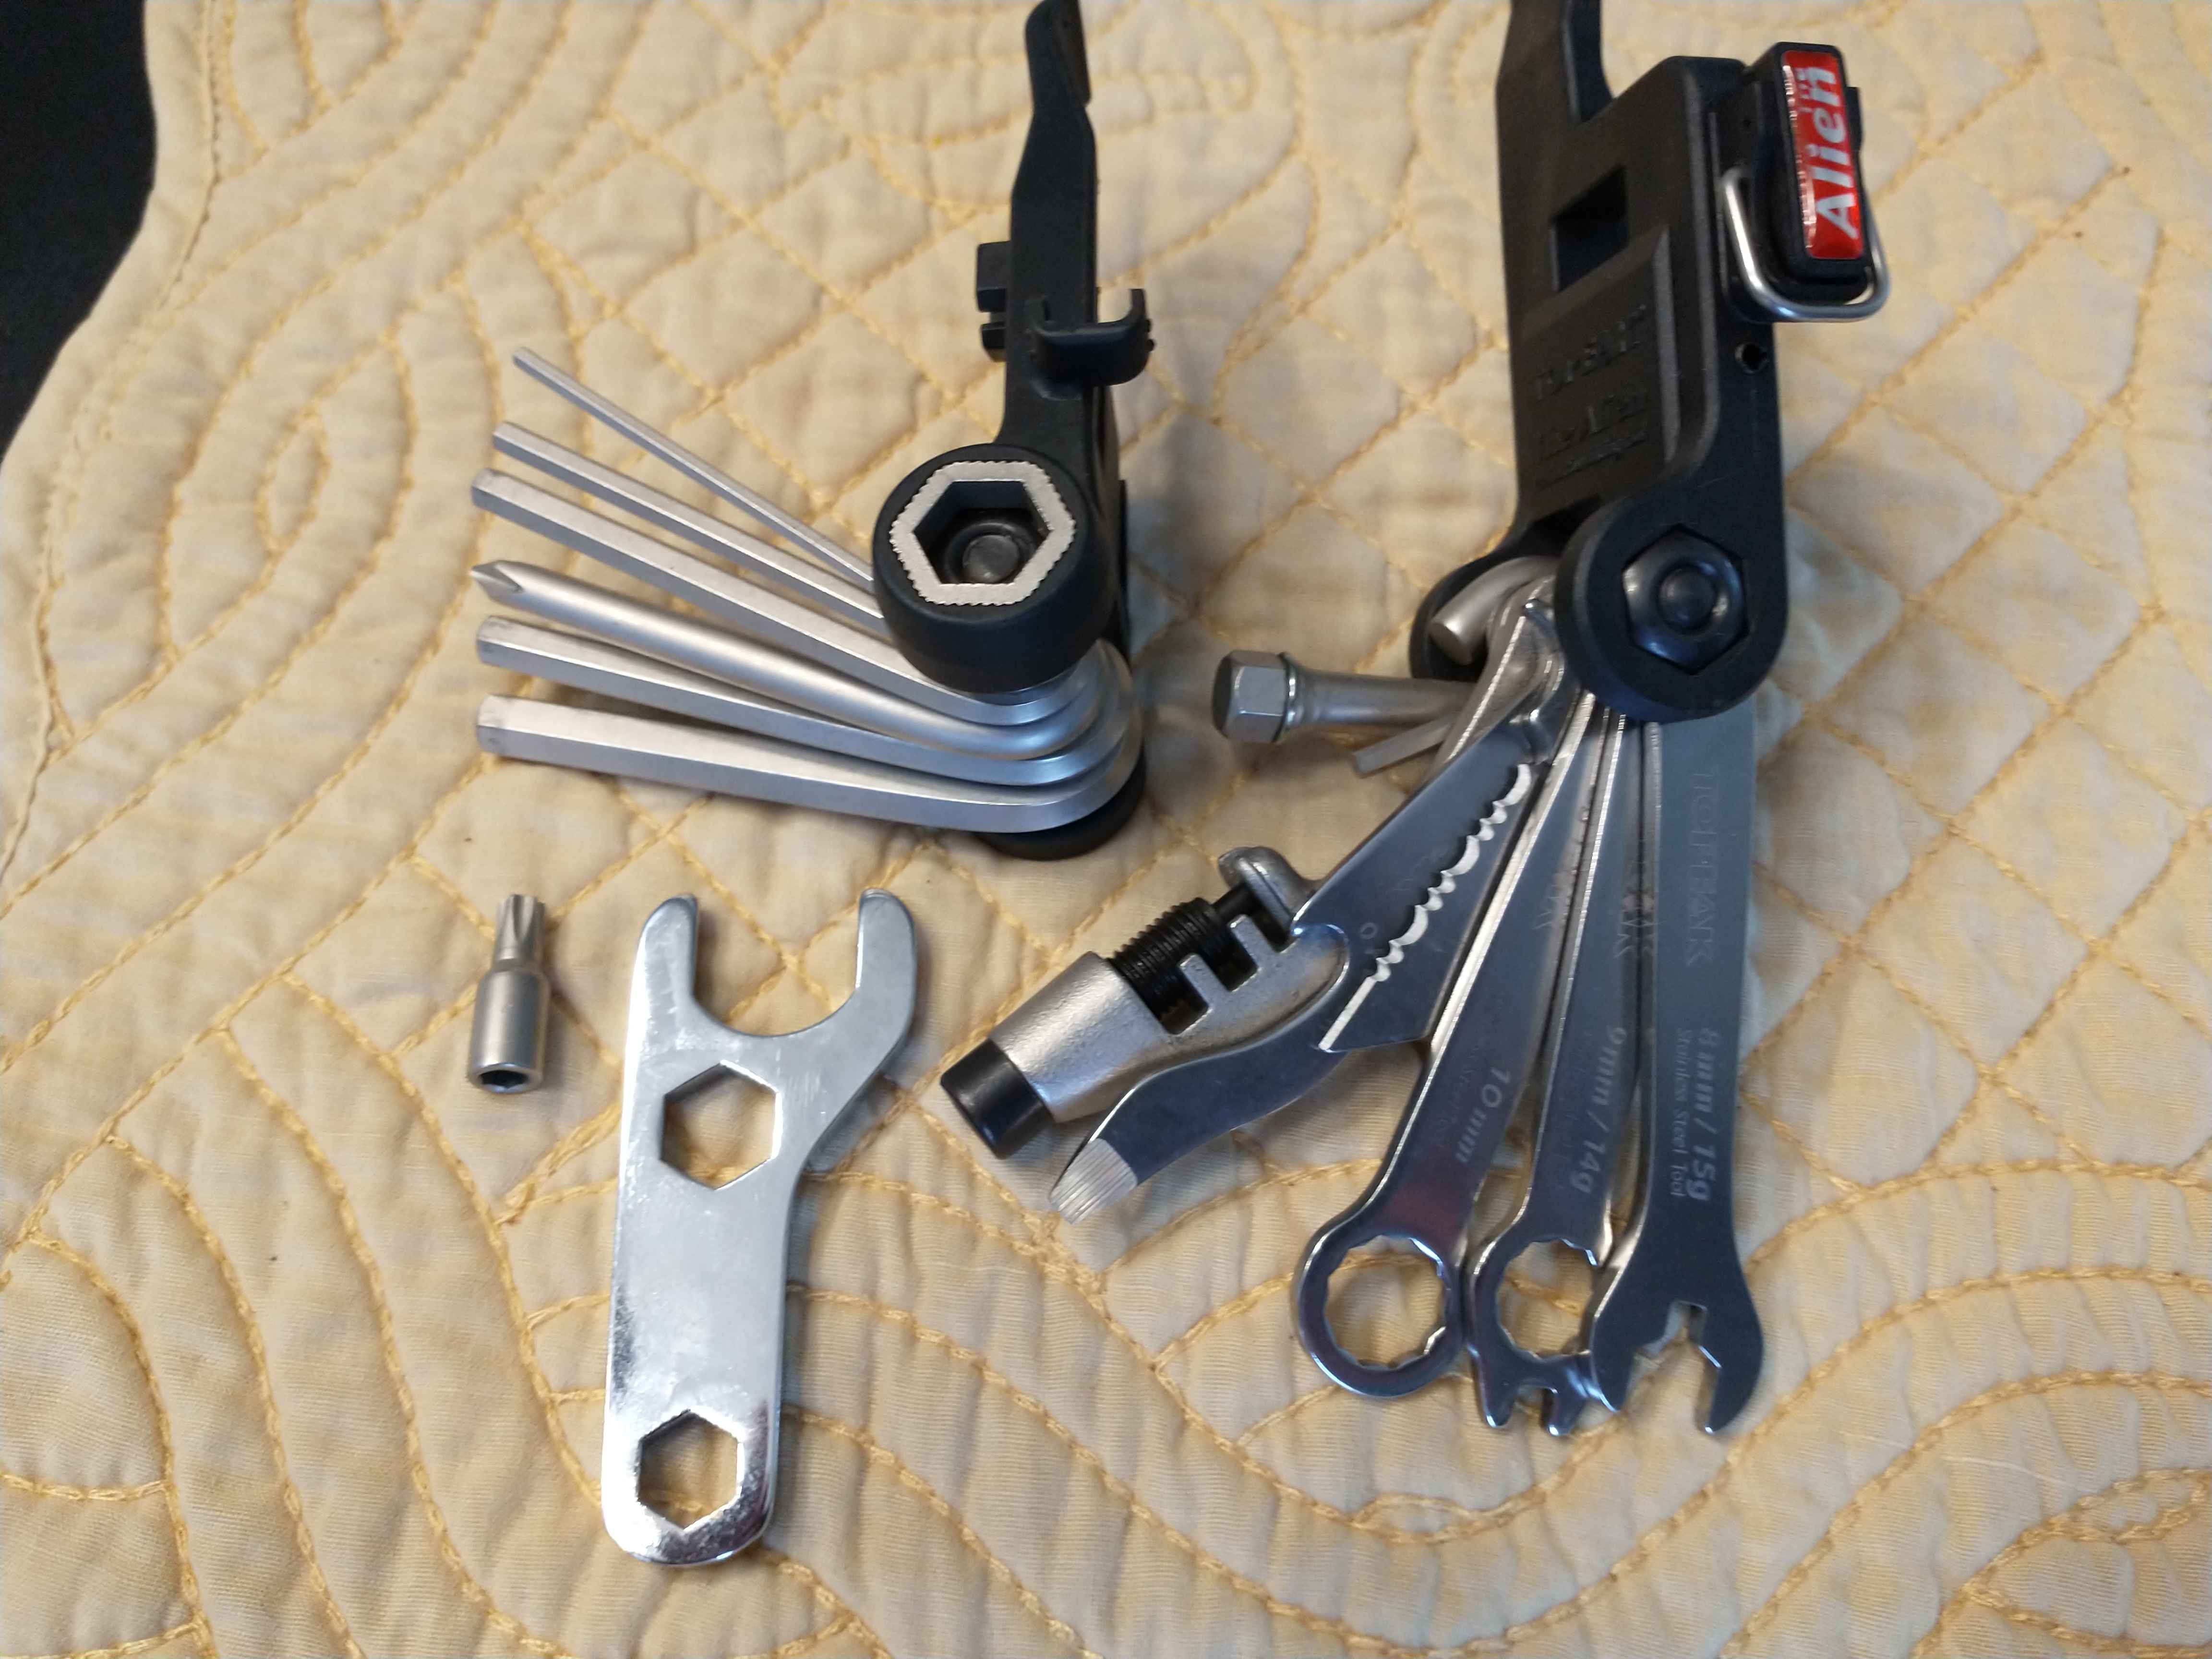
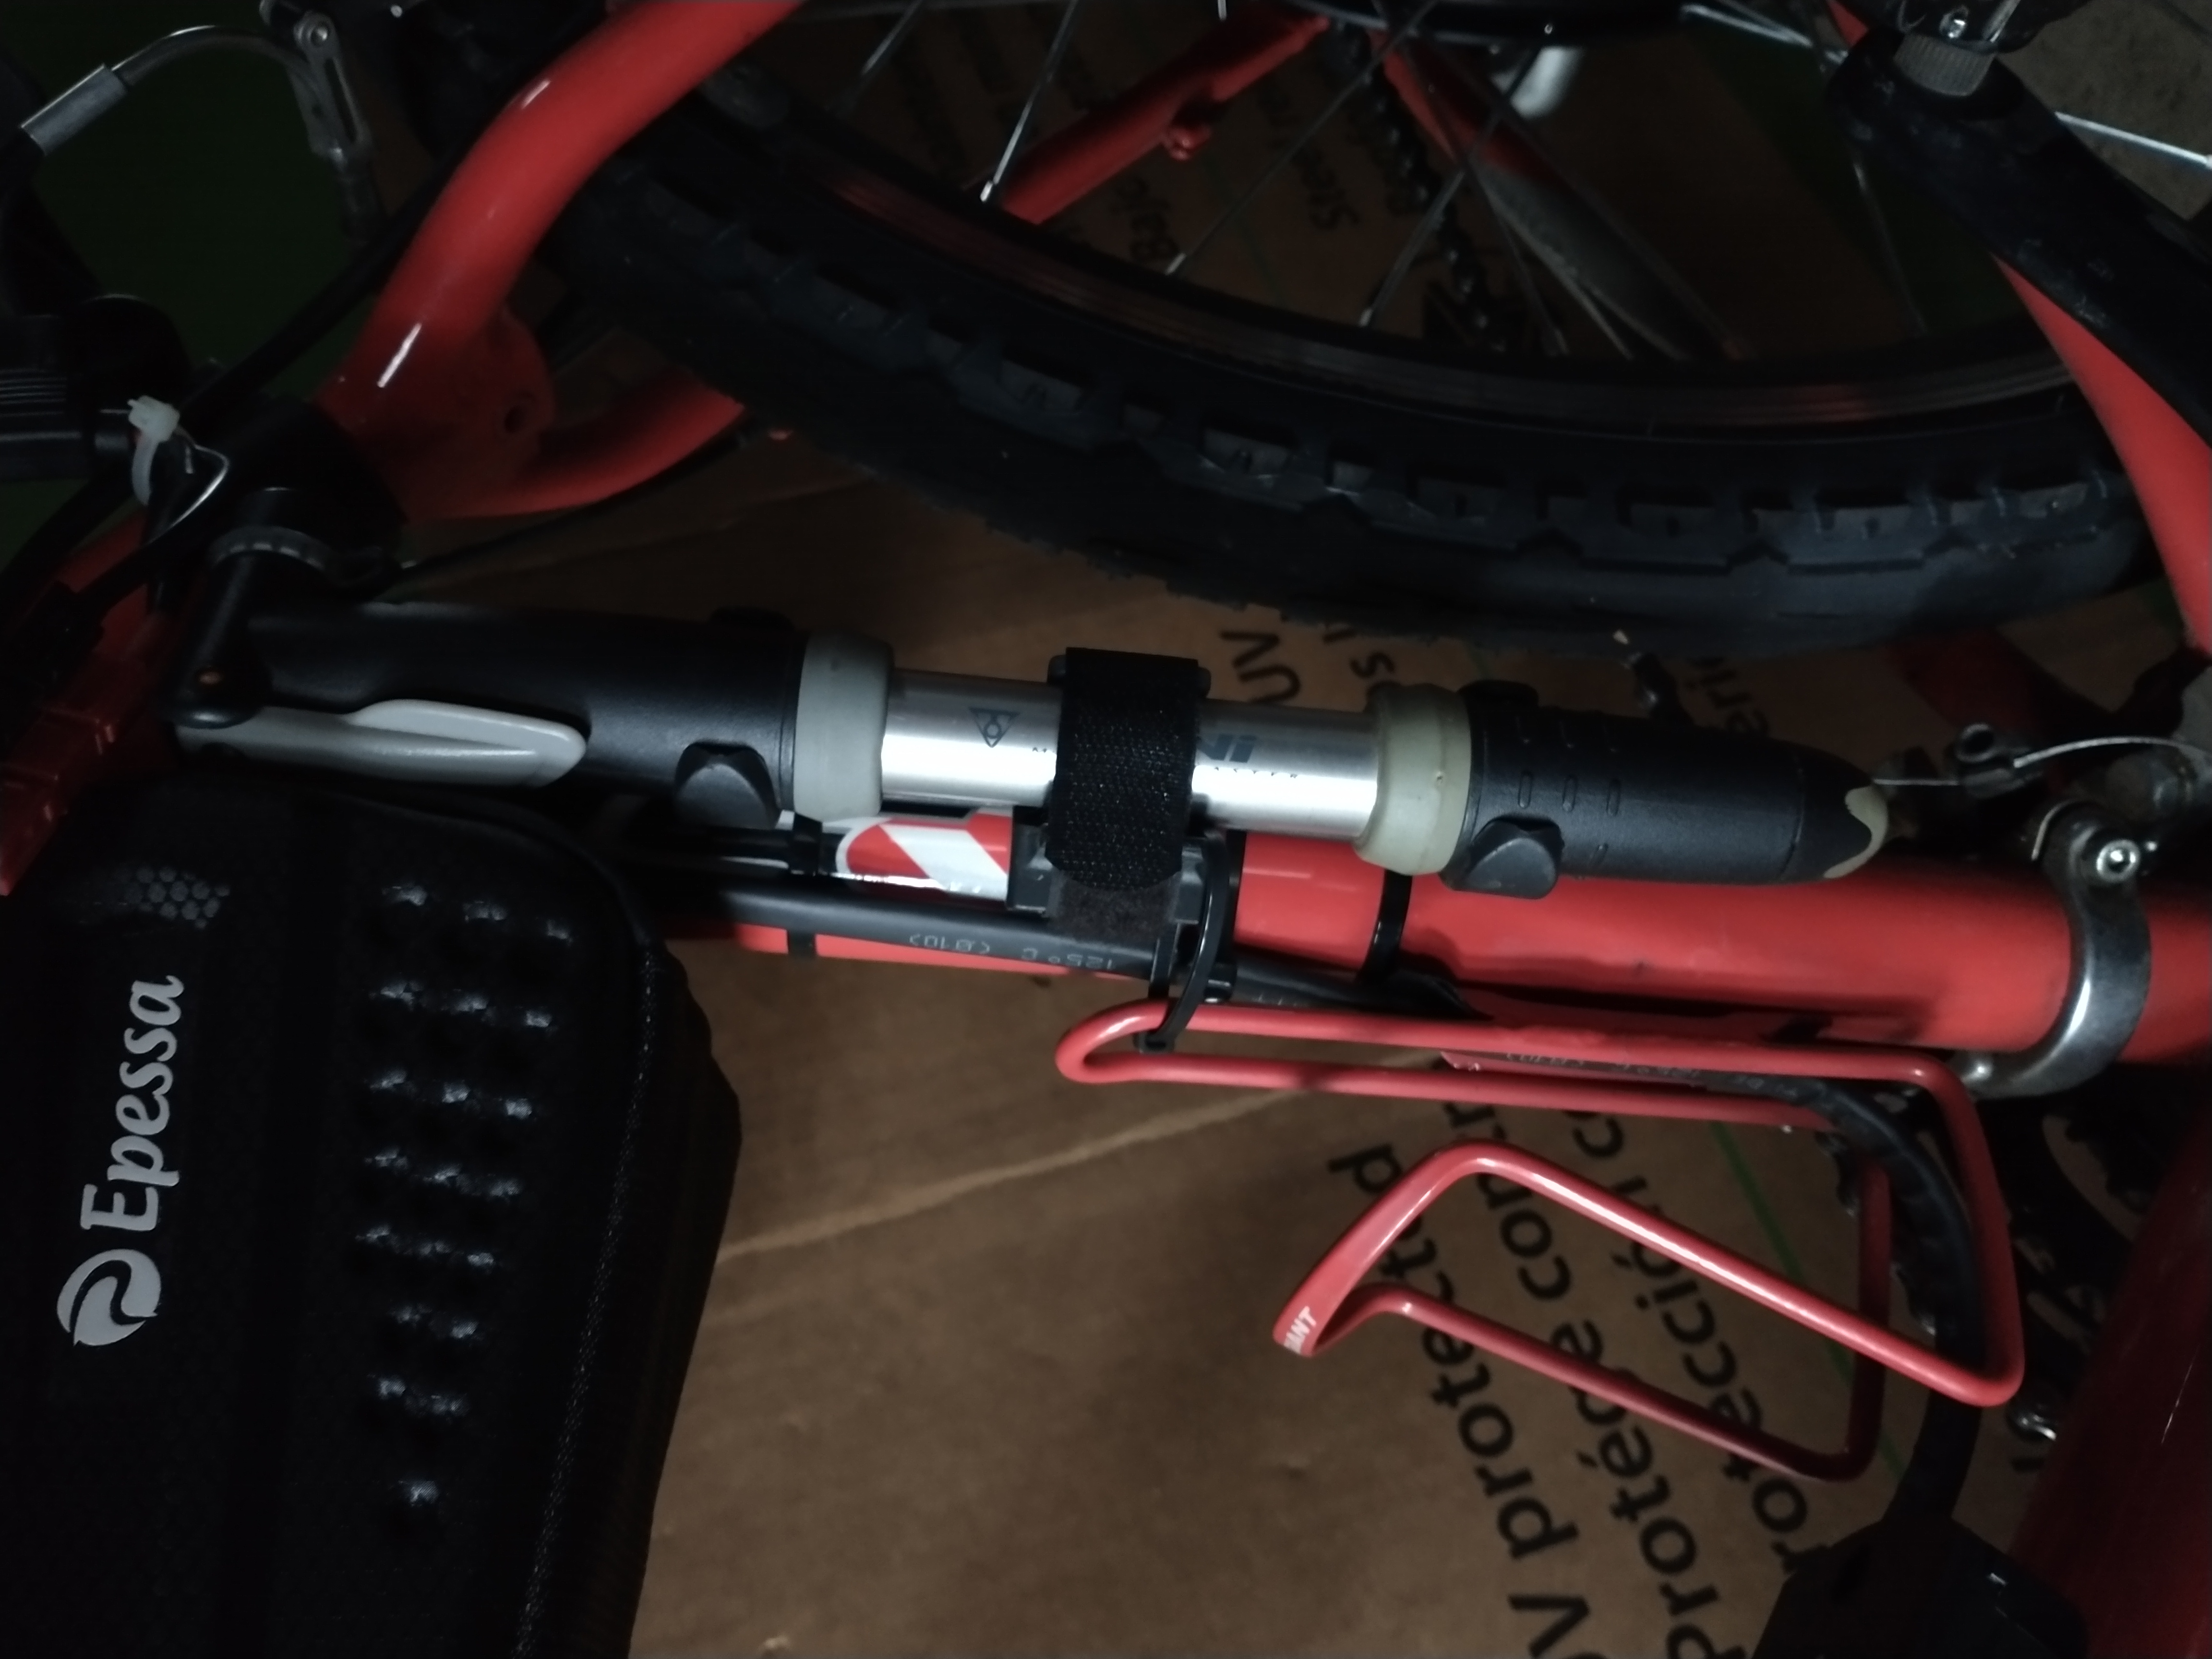
From left to right, a spare tube that’s the correct size and type for your bike, a set of plastic tire levers (you can get by with 2 but I like to carry 3), lightweight spoke wrench, multi-tool designed for bicycles (the one shown above is different than the link since it doesn’t appear this particular Topeak multi-tool is available anymore), tire pump (the image below shows this type of pump mounted to the frame so it doesn’t need to be carried in the tool bag), Velcro hook & loop straps (from this Duramax 840-piece kit), some ’emergency’ cash, surgical gloves, and a basic first aid kit. What’s missing from the image above and will be added shortly to my kit is a lightweight Gerber multi-tool with scissors and pliers and a small rag for cleanup after repairs.
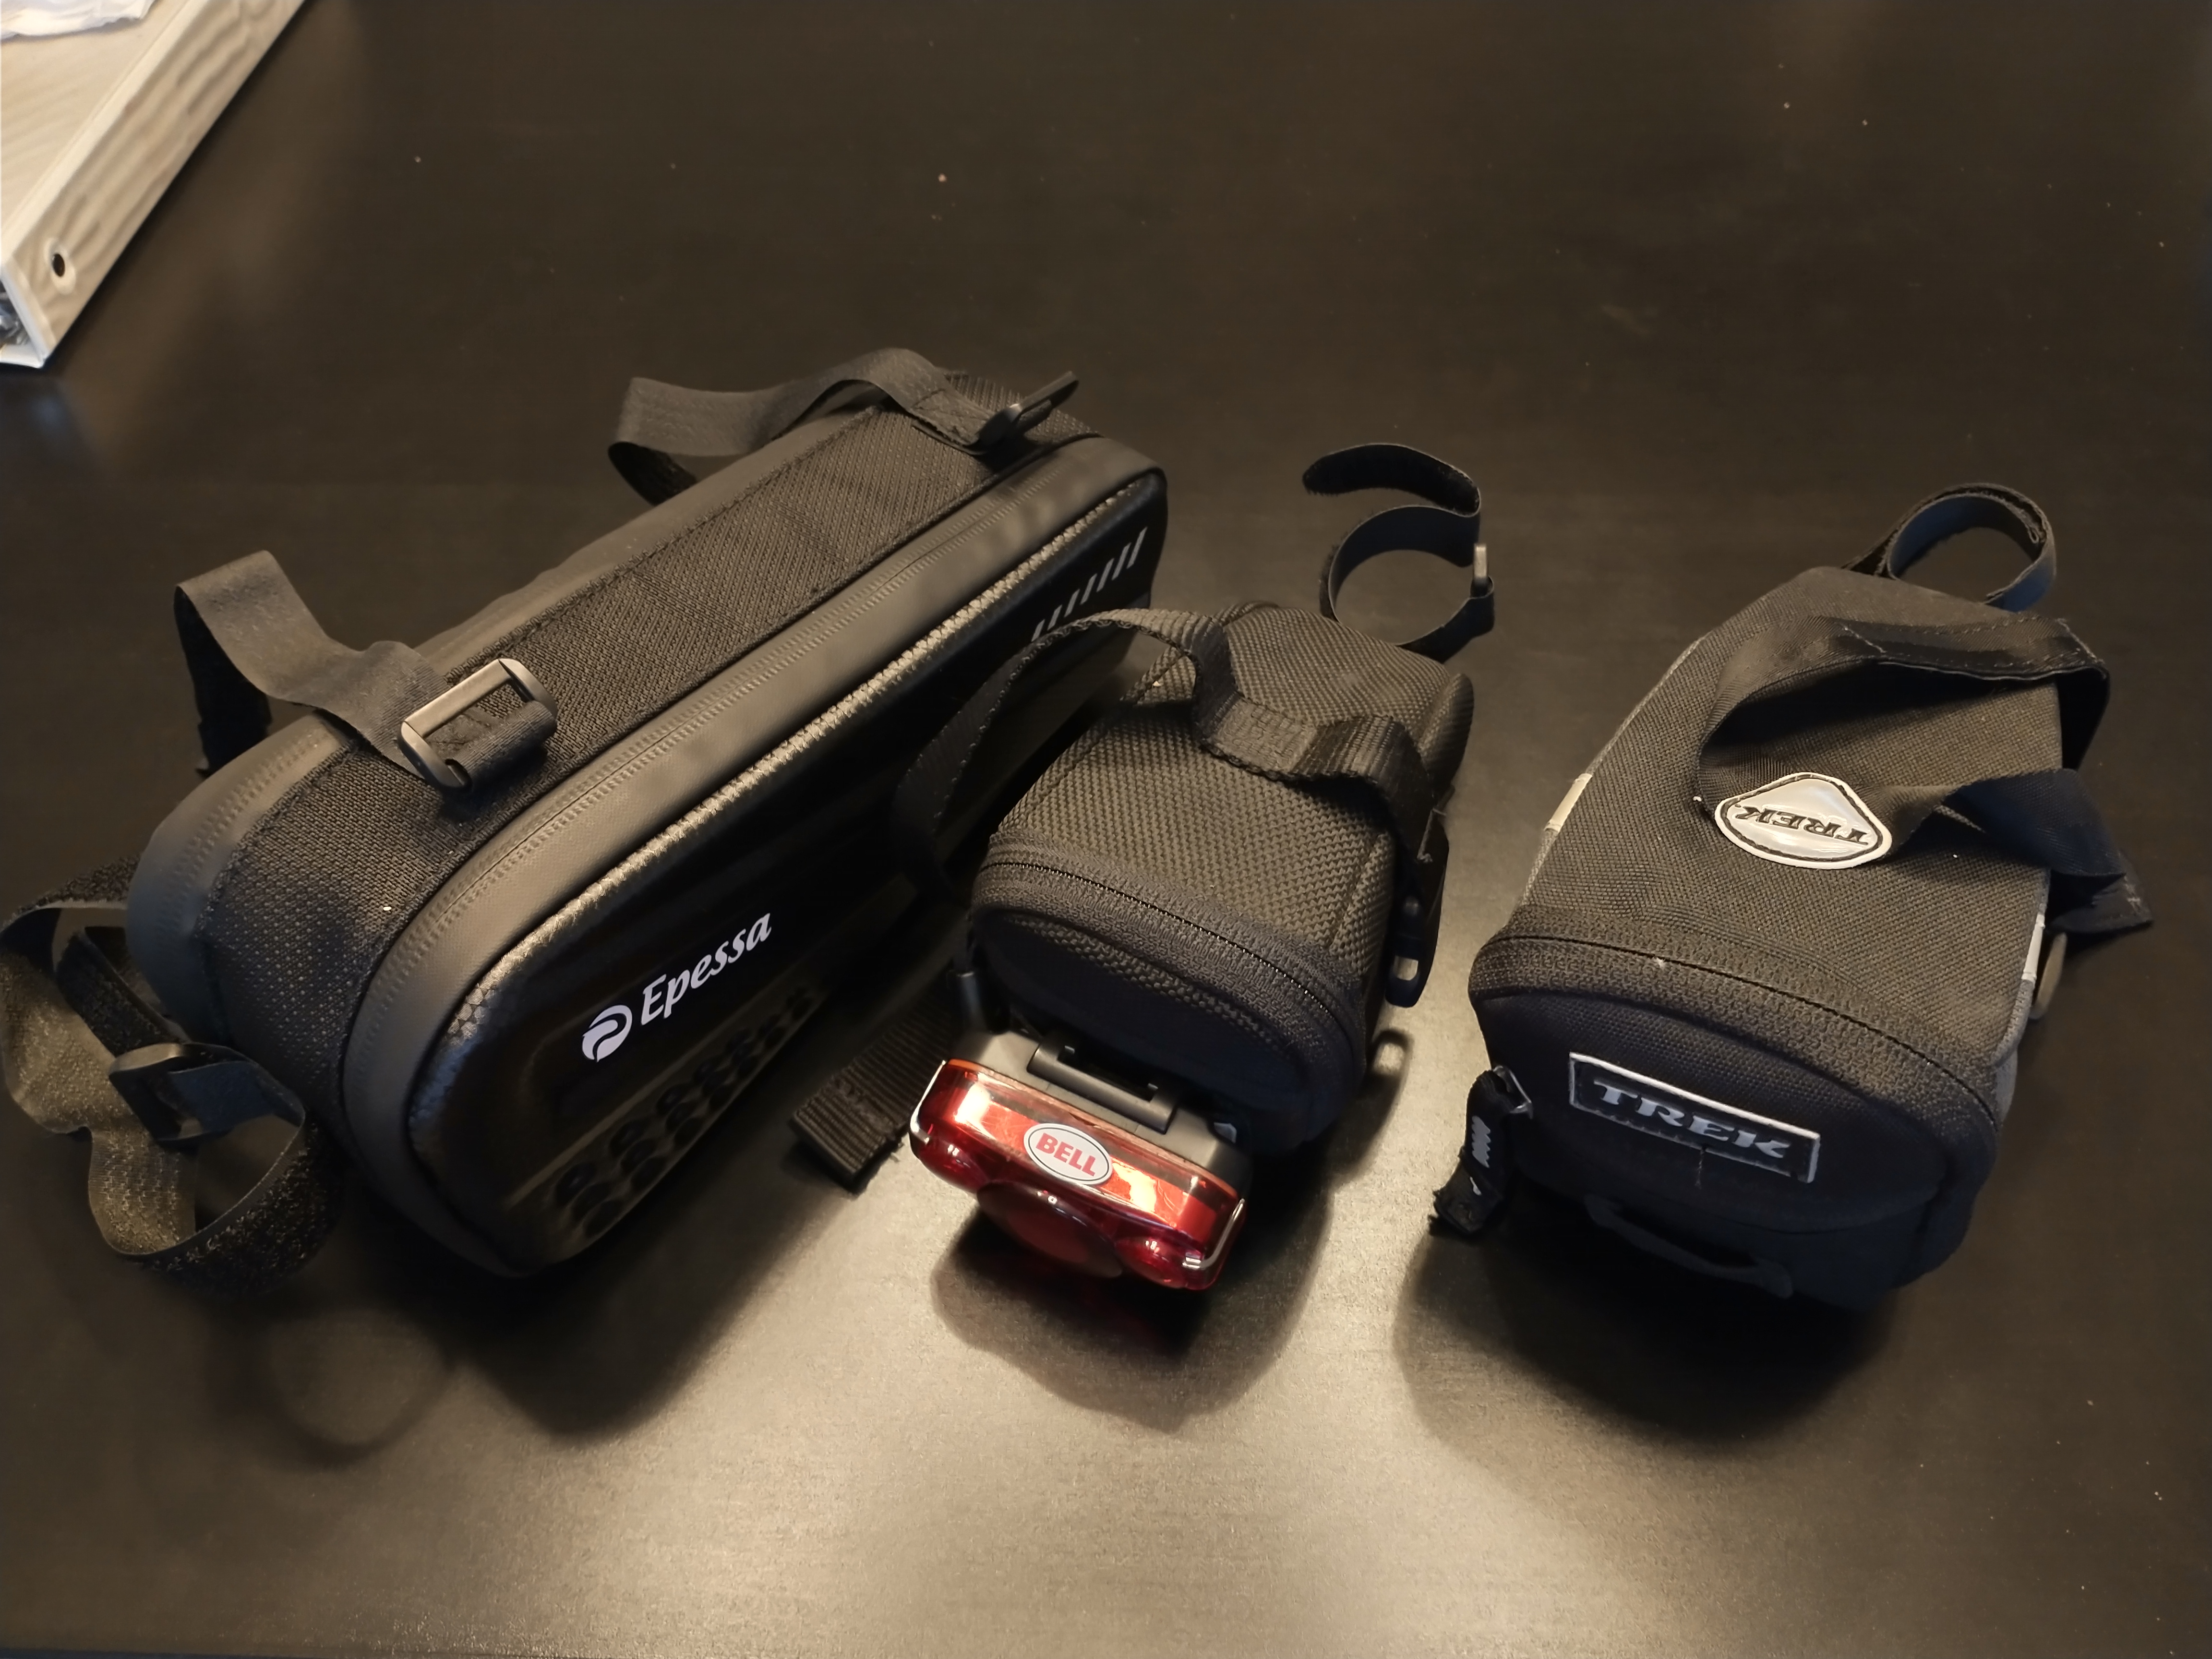
All told, this kit set me back about $100, plus the cost of a frame or seat bag (budget $20 for this) to carry everything in. Below are additional images of various bags I own, an exploded view of my Topeak multi-tool, and a frame-mounted air pump. Also not shown in the image above is a 20-amp fuse that I carry should I blow the fuse between the battery and controller, and a spare key to remove the battery if that becomes necessary.
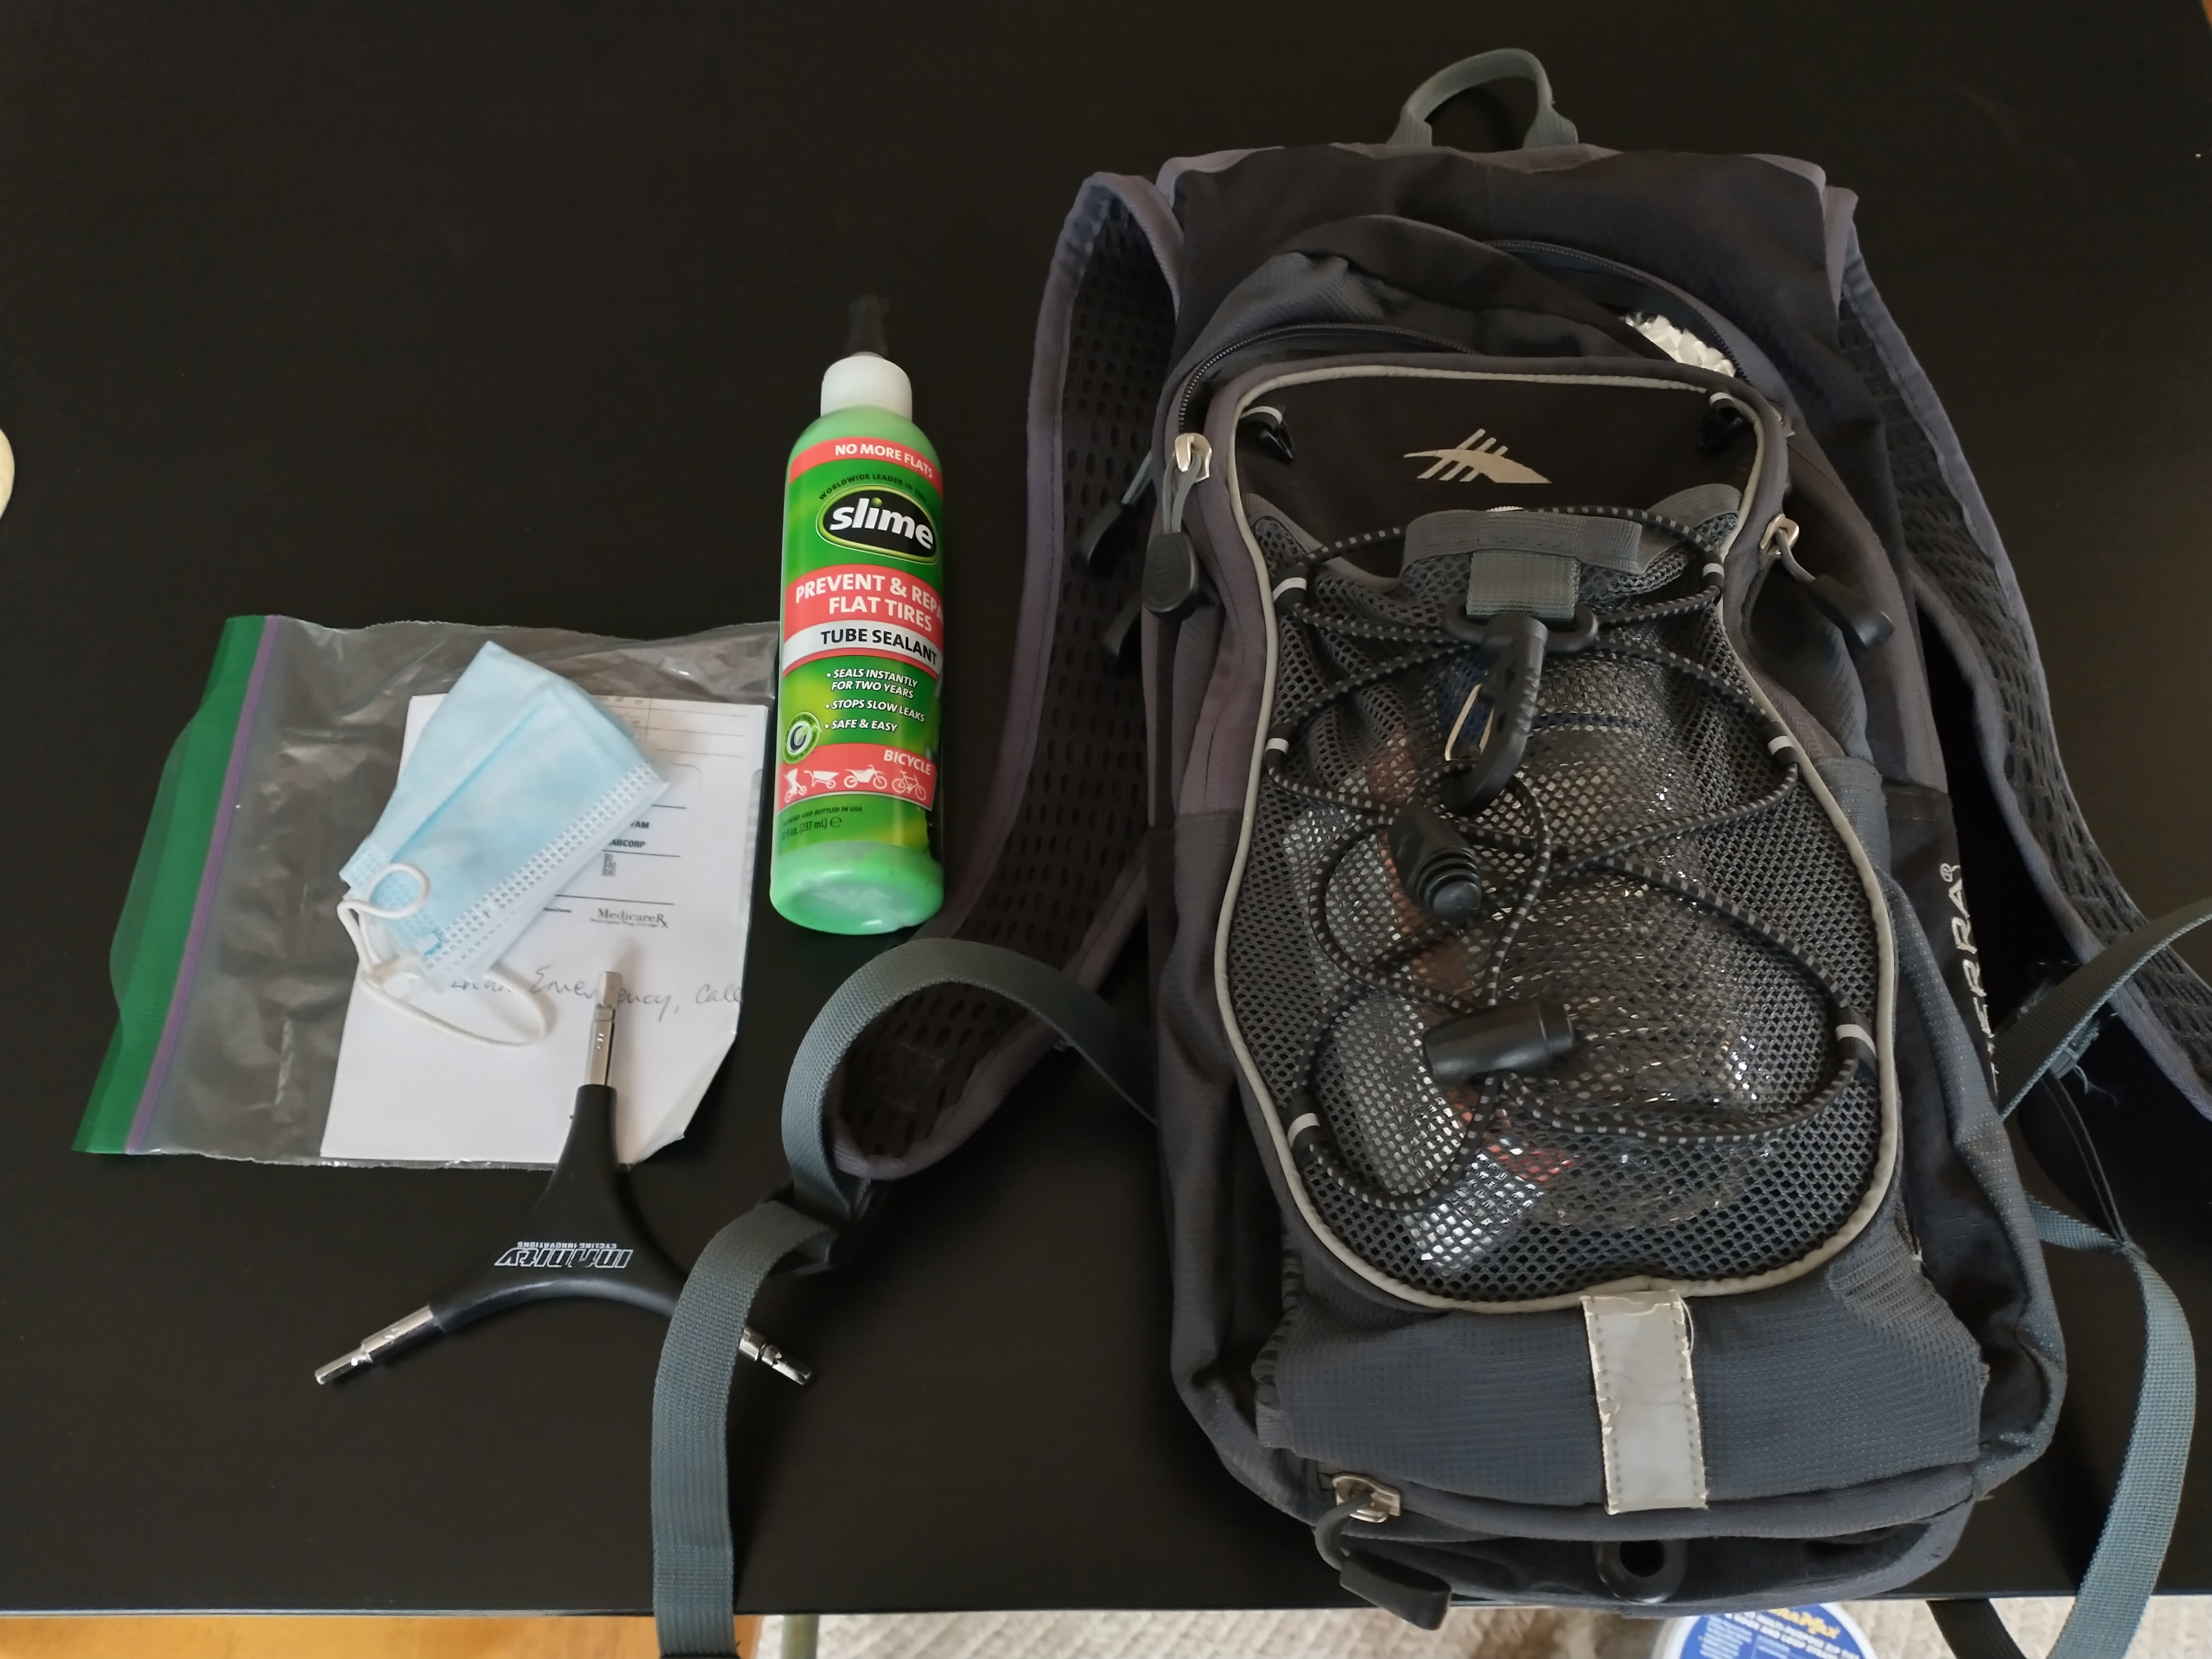
Before we get off this topic, there are a few more items I think are important. When I ride, I take with me a hydration pack, but without the hydration bladder. I use it as a lightweight backpack to carry the following items:
- A water bottle
- A granola bar or two
- A cell phone with a good charge – doesn’t do much good if the battery’s dead though my e-bike batteries include a USB charging port so I could/should carry a USB charging cable which could save my bacon some day
- A printed copy of my driver’s license and medical cards along with an emergency contact phone number, some cash and a mask or two – keep these in a weather-proof bag
- On some trips I’ll carry a cable and lock so I can lock the bike up if I need to leave it unattended
- I’m also going to start carrying a bottle of Slime for a quick (albeit messy) flat repair, which I hope I never have to use!
Here’s an image of the hydration pack I have been using. There are many options out there, but if you don’t own one, here’s one to consider: Hydration Backpack
I think I included everything I find useful, however, if price weren’t a consideration, I might be inclined to invest in some additional ‘tools’ such as these:
Wolf Tooth Master Link Combo Pliers $32
Topeak Ratchet Rocket Multi-Tool $41, or
Topeak Ratchet Rocket Lite NTX+ $85
KNIPEX Tools 5-Inch Mini Pliers $52
But alas, price is a consideration and I’ll find less costly ways to skin cats (maybe I shouldn’t use that expression with this audience – sorry), even if I need to carry a bit more weight in my repair kit.
As I conclude this post, I want to direct your attention to a few YouTube videos that I found informative when it comes to creating your personal bicycle repair kit. Here they are, and thanks! I hope this has been helpful…
What you need in a Bicycle Repair Kit!