As important as tires and wheels are for e-bike safety, brakes might be even more critical. Not being able to stop effectively will eventually be an issue. Better to deal with your brake issues sooner than later. Brakes are all about ‘stopping power’. In fact, if you’re riding your e-bike correctly, you’ll use your front brake about 90% of the time where 70 to 80% of your effective braking occurs. This is not to say that rear brakes aren’t important, they are. But your best stopping power is coming from the front brake.
In the old days, ‘caliper brakes’ were the thing. Mountain bikes tended to have brakes that provided more leverage, hence greater braking force, while road bikes had smaller calipers which exerted less force, but were sufficient for the job at hand. Today, only inexpensive bicycles have caliper brakes, and no ‘factory’ e-bike I have seen recently has calipers. Yet, if you’re contemplating converting an old bicycle to an e-bike, you might well decide to keep the caliper brakes rather than upgrading to disc brakes. That’s fine as long as the brakes your keeping have ample stopping power.
For example, my mid-drive e-bike has caliper brakes that are very effective. I see no need to upgrade. I replaced the brake pads with pads that have good stopping power and will stay with that. As mentioned a moment ago, most of the stopping power is being done on the front wheel. With that in mind, my first DIY e-bike has a ‘hydraulic’ disc on the front (major stopping power) and a caliper on the back. This configuration is working really well for that bike.
Then when it came time to build my second DIY e-bike, I decided to try out ‘mechanical’ disc brakes fore and aft and I’m very happy with the results. I was also surprised with this build how inexpensive a good set of mechanical disc brakes could be. This is the set I chose and I’m delighted with their performance: RUJOI Mechanical Disc Brake Kit, Aluminum Front and Rear Caliper, 160mm Rotors ($23)

Yet the adapter alone for the rear brake on this build cost more than the complete brake set. Oh, and one other thing, when you’re building an e-bike, and especially when you’re upgrading your brakes, be sure to buy a new set of cables (incl. a cable cutter tool if you don’t have one).
So let’s talk a bit more about brake tech. Above, I introduced caliper brakes, and hydraulic and mechanical disc brakes. As you can imagine, there are many price points and designs to consider when you’re shopping for brake parts. There are also different disc diameters to consider. I went with 160mm discs front and rear, but on many e-bikes you’ll find a larger diameter disc on the front for more braking power. These discs can be 180 or 203mm in size. Larger discs require different spacers to move the brakes farther away from the hub. Just something to consider.
In theory, hydraulic disc brakes provide better stopping power with less effort at the brake lever. This is true, but you’ll need to decide if the upgrade to hydraulic disc brakes is worth the extra cost. In addition, hydraulic disc brakes come with their own brake levers and brake fluid reservoirs, and they’ll likely need more maintenance than mechanical brake systems. And e-bike brake levers usually have a motor cut-out switch built into the brake lever. The levers that come with your hydraulic brake kit won’t have this feature. I was able to add a switch to my hydraulic brake lever with some effort, but this is not optimal.
One last thought on disc brake systems is that you’ll need to think about replacement brake pads at some point. The mechanical brakes I bought say they use a “Universal Brake Pad compatible with Shimano Deore M515/M525/M475…”. So when you’re shopping for new pads, be sure the pads you buy are compatible, and have a good rating. In all honesty, when I bought my first hydraulic brake system, I didn’t even think about brake pad compatibility, so now I’m curious what pad that brake uses. Hopefully, having read this, you’ll be better informed.
** Update **
My first DIY e-bike is working great EXCEPT for one thing – the rear caliper brake stinks! There seems to be a bit of metal caught in the rim that makes a weird sound each revolution of the rear wheel when the rear brake is applied. As you might recall, I had converted the front brake on this bike to a hydraulic disc which I absolutely love. The rear brake I left with the original caliper since most of the braking is done with the front brake. Anyway, something needs to change regarding the rear brake, so this is what I’m doing.
I ordered a mechanical disc brake and floating 160mm disc for the rear. Here are the parts and images. I’ll provide a picture below of the completed modification and my first impressions once the upgrade is complete.


corki 160mm 180mm Bicycle Disc Brake Rotor with 6 Bolts ($13)
Total outlay for this mod is $38+tax. I think this will be a significant improvement to my rear braking performance (and it’s red – that’s important!).
** Update **
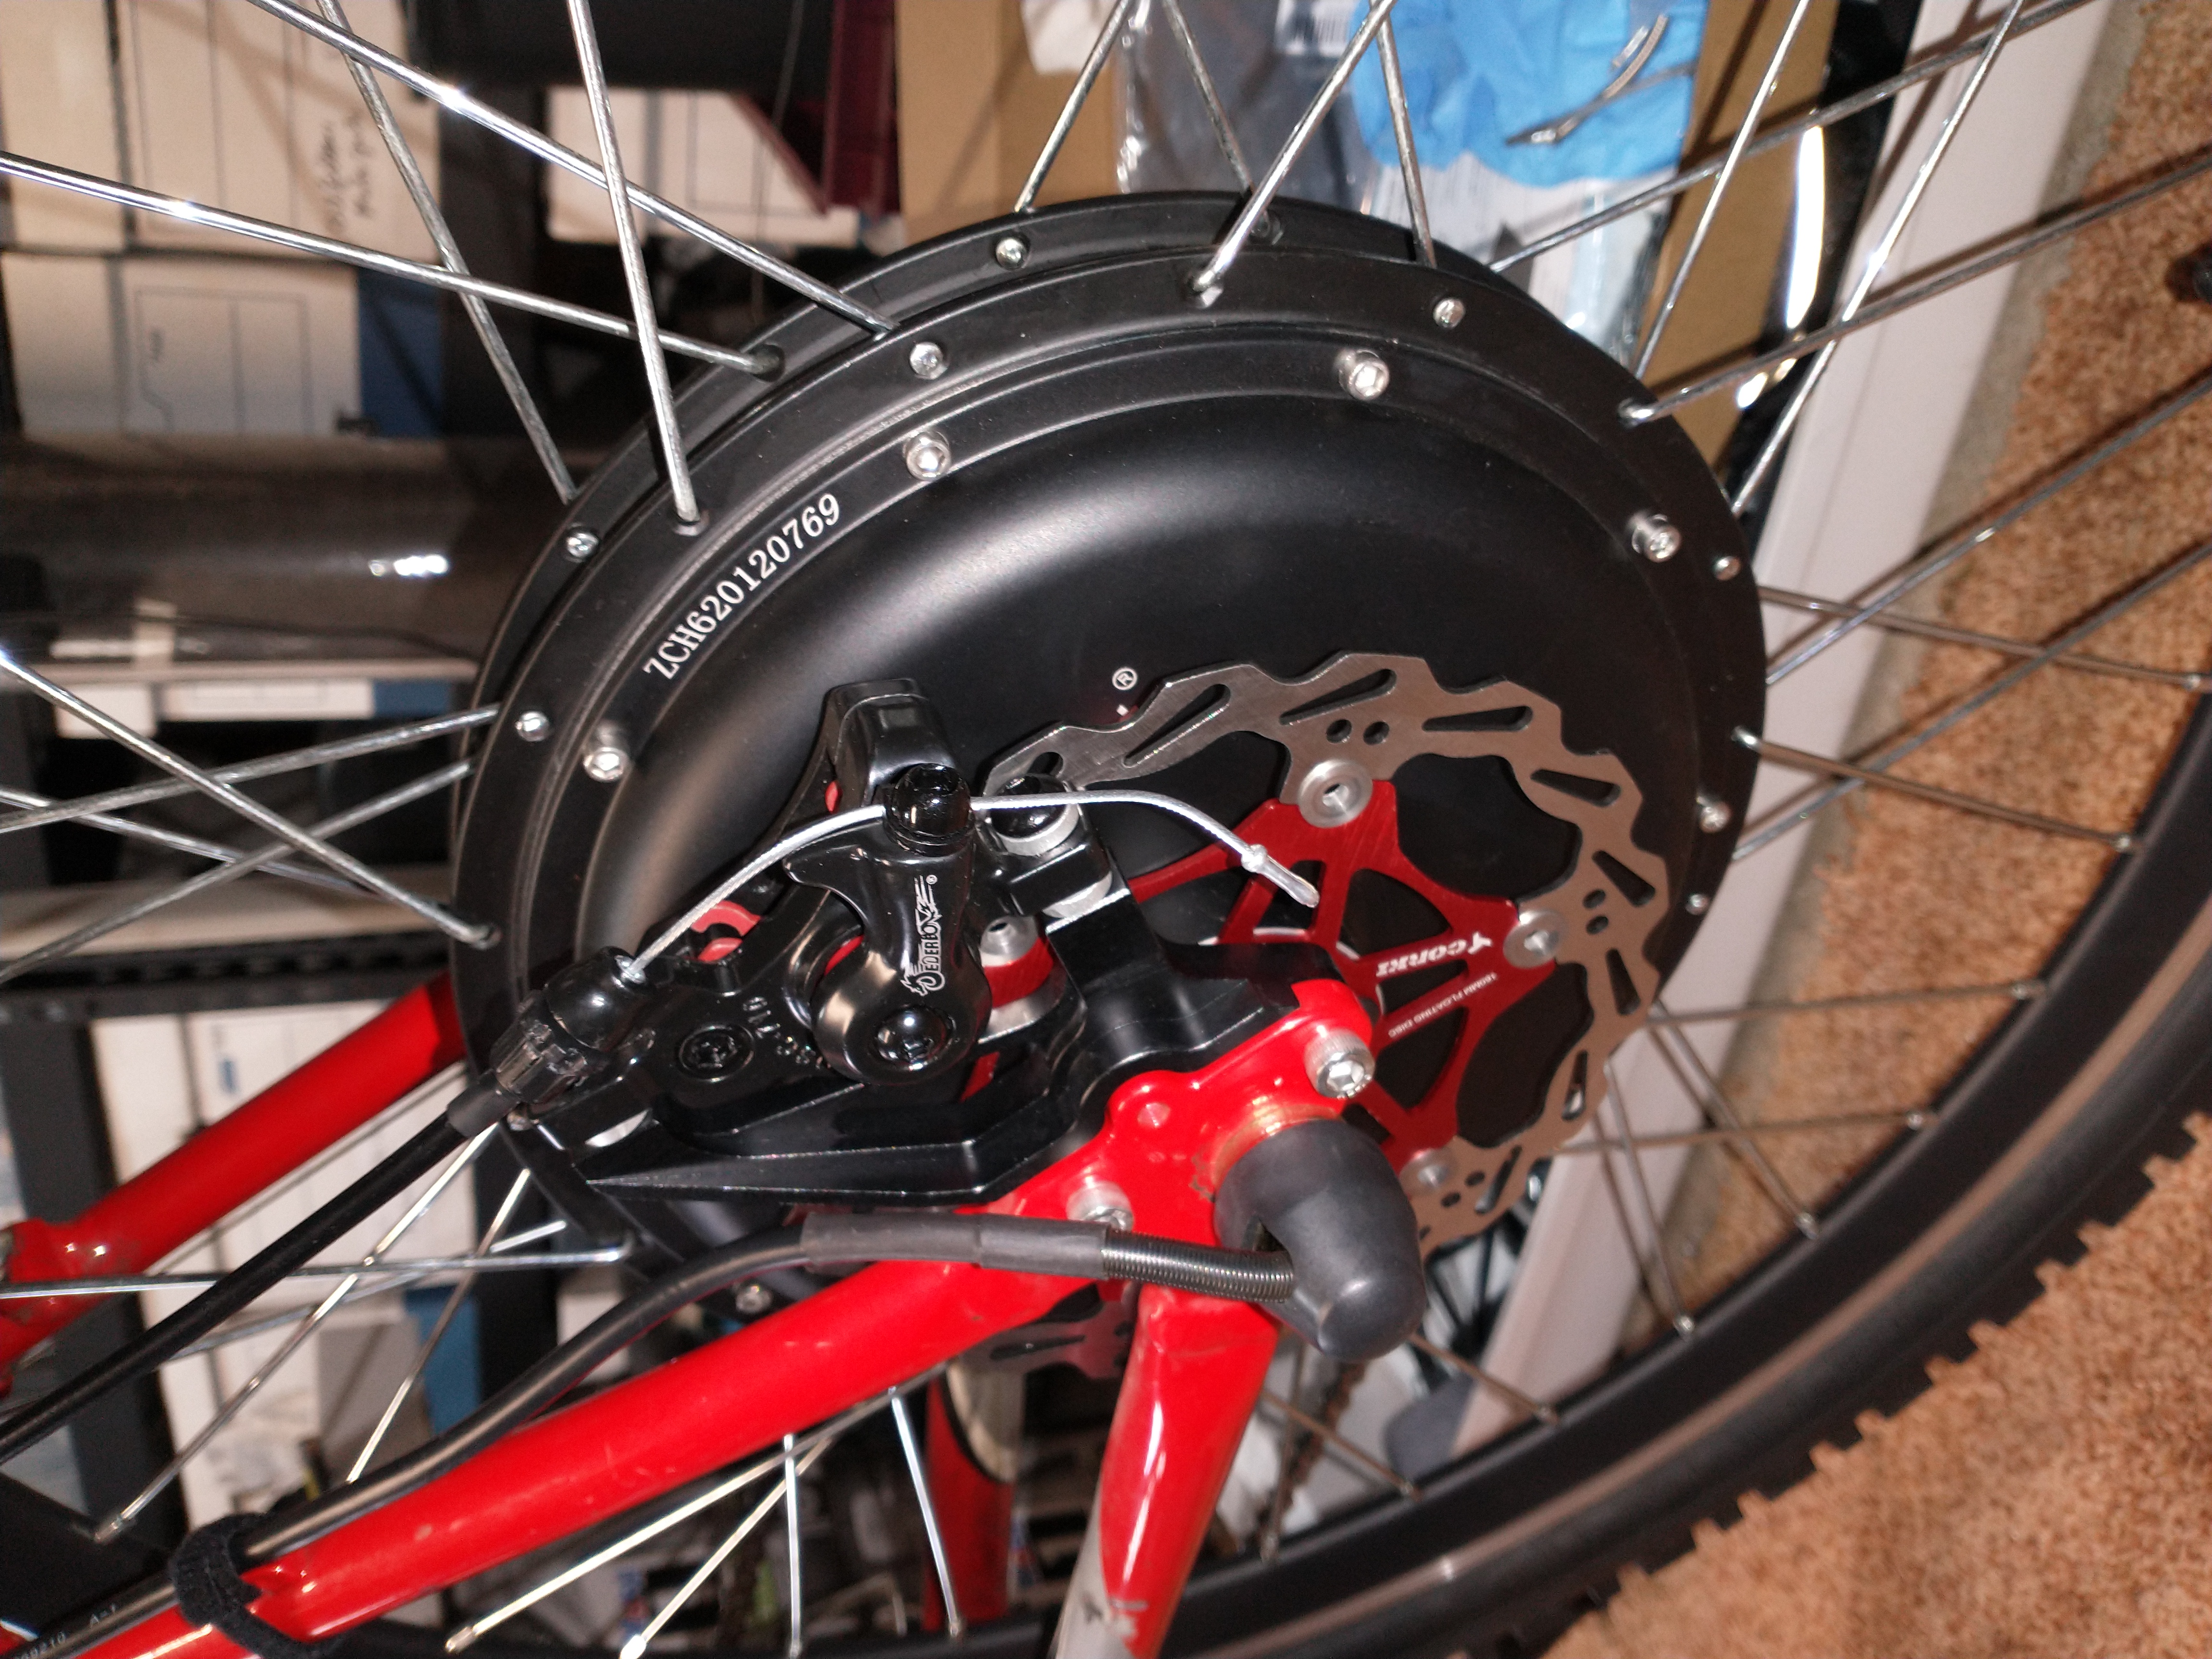
Having received both the disc and brake, I realized I also needed a disc brake adapter for the Trek frame. Add $25 for that. Then I needed some new brake cable housing (plus $9). SO, now my brake mod adds up to $72+ tax. And yes, it’ll be worth it (picture to be provided when the mod is complete – tomorrow).
And I learned something new today – from YouTube of course! This video covers disc brake adjustment procedures. Interestingly, I sort of figured this out myself, but if you’re new at this, I think this video is a great place to start.
How to Align a Mechanical Disc Brake on a Bike
It’s tomorrow today, so here’s the picture I promised: